
Engineering Drawing in 2025
All you need to know in one page
.png)
Elevate your engineering skills with our comprehensive GD&T Training course. This training covers both ISO GPS and ASME Y14.5 standards, ensuring you master the essential principles of GD&T.
$250
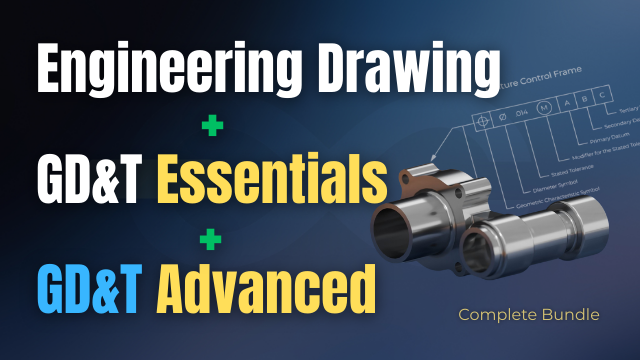
Master GD&T from basics to advanced in one complete certification pathway. Covering ISO GPS & ASME Y14.5-2018, this bundle includes fundamentals + advanced training with certification for engineers and professionals.
$599

Beyond the basics: This advanced Geometric Dimensioning and Tolerancing training dives deep into ISO GPS and ASME Y14.5 2018 standards, covering modifiers, datum boundaries, positional and profile tolerancing, and fastener design.
$350
The need for technical drawing
Think about a scenario where you, as a design engineer based in the U.S., are tasked with overseeing a component's production in China and its subsequent assembly in France. The challenges are evident: language barriers, cultural nuances, and logistical concerns.
The stakes are high. Misunderstandings or inaccuracies can lead to costly mistakes, production delays, or even product malfunctions. Written descriptions can be misinterpreted, and verbal instructions over calls might miss essential details. So, what's the most effective solution to this puzzle? The answer is technical drawing.
Technical drawings serve as the universal language in the engineering, architecture, and manufacturing sectors. These drawings carry a weight of information, from dimensions and materials to assembly instructions and quality standards. They leave little room for error, ensuring that every stakeholder, irrespective of their location or language, understands the task at hand with the same clarity.
In this resource, we aim to not just introduce you to the principles of technical drawing but to immerse you in its practical applications. We'll use a simplified engine assembly as our primary practical example, giving you a tangible context. Each module will break down complex engine components - like the piston, connecting rod, and crankshaft - and guide you in transforming these intricate parts into detailed technical drawings.
Visit Excedify's Technical Drawing Course and GD&T Essentials Course or GD&T Advanced Course or purchase both in the GD&T Training and Certification Program
The standards behind Engineering drawings
ISO and Technical Drawings: The ISO is a global entity that establishes and promotes standards across various industries. For technical drawings, several ISO standards are critical. The most fundamental is ISO 128, which outlines the general principles of presentation for technical drawings. This standard ensures that drawings, irrespective of where they are created, maintain consistent presentation methods, making them universally comprehensible.
Lettering in Technical Drawings: ISO 3098 specifies the requirements for lettering, primarily for characters in Latin alphabets, on technical drawings and associated documents. This ensures legibility and uniformity, especially critical when drawings cross international borders.
Dimensioning and Tolerancing: ISO 8015 and ISO 2768 are key standards here. They govern how dimensions and tolerances are represented on technical drawings, ensuring measurements are universally understood and interpreted without ambiguity.
Other Global Standards: While ISO dominates the international scene, there are regional standards, like DIN in Germany or ANSI in the United States. Though they might have country-specific elements, these standards often align closely with ISO, ensuring a level of global consistency.
Importance of Standards: Utilizing these standards isn't just a matter of formality. They ensure that technical drawings are precise, consistent, and universally understood, minimizing errors, misinterpretations, and costs associated with misunderstandings. Adhering to these standards facilitates smoother communication, collaboration, and execution in global projects.
The Drawing sheet
If you're creating engineering drawings, understanding the basics of drawing sheet sizes and layouts is critical. The standard for this is ISO 5457"1999.
The first choice for standard drawing paper sizes are the conventional 'A' sizes. These sizes are shown in Figure 1.9, and can be used in either portrait or landscape orientation. No matter the orientation used, the ratio of the two sides should be 1:√2, or 1:1.414. The basic 'A' size is 'A0', which has a surface area of 1m² but follows the 1:√2 ratio. From there, A1 is half of A0, A2 is half of A1, and so on.
A blank drawing sheet should contain a title block, a frame for limiting the drawing space, centering marks, and orientation marks. The first three are mandatory, while the last four are optional.
Drawing Border and Coordinate System in Technical Drawings:
A border should be used to define the edge of the drawing region, . The border shows the edge of the drawing area and reveals if the drawing has any torn-off corners. The drawing frame is the area within the border.
A border not only gives the drawing a neat and professional appearance but also provides a structured area, known as the "drawing frame," within which all the drawing's details are contained. Adjacent to this border, especially on larger or more complex drawings, are alphanumeric coordinates placed along the vertical and horizontal edges.
Alphanumeric Coordinates: Just as with a map or a grid, the vertical (Y-axis) side typically carries letters (A, B, C, etc.), while the horizontal (X-axis) side carries numbers (1, 2, 3, etc.). These alphanumeric markers create a grid system over the drawing.
Locating Elements: By referencing a combination of a letter and a number, one can quickly pinpoint specific areas or features on the drawing. For instance, a reference to "B3" would guide the viewer to the section of the drawing corresponding to the intersection of the "B" row and "3" column.
Streamlining Communication: When multiple professionals are collaborating, or when changes are made, these coordinates simplify communication. Instead of vaguely referencing "the top right corner," one can precisely mention "zone E5," ensuring clarity.

Consider a detailed technical drawing of a piston, showcasing various dimensions, cross-sectional views, and annotations about materials, tolerances, and surface finishes.
During a review, the lead engineer identifies that there's been an error in the diameter specification of a certain piston segment. Instead of offering a lengthy description like "the section near the piston crown, just below the first compression ring," the engineer can use the coordinate system to provide clarity. They simply indicate that the required change is in field "D6."
A drafter or junior engineer, equipped with this precise reference, can instantly navigate to the exact location on the drawing marked by D6. There, they'd find the specified diameter and can quickly revise it as per the lead engineer's instructions. This approach minimizes potential confusion, accelerates the correction process, and ensures accuracy in the drawing's details.
The Titel block
The title block is a designated area of the drawing sheet that contains essential information for identification, administration, and interpretation of the drawing. It is typically located in the bottom right-hand corner of the drawing, no matter the orientation used.
The manual of British Standards in Engineering Drawing and Design recommends that a title block should include the following basic information: the name of the company or organization, drawing number, title, date, name of the draughtsman, scale, copyright, projection symbol, measurement units, reference to standards, sheet number, number of sheets, and issue information.
Supplementary information can be included as necessary, such as material and specification, heat treatment, surface finish, tolerances, geometrical tolerances, screw thread forms, sheet size, equivalent part, supersedes, superseded by, tool references, gauge references, and warning notes.

In our drawing, we have information in the title block about the company, the part title, drawing number and revision, the scale, and the persons responsible for drawing, checking, and releasing the drawing.
The revision Table - tracking drawing changes
A revision table (or rev block) is a critical element in technical drawings, especially in industries that require rigorous documentation and tracking of changes made to a drawing over its lifetime. Here's a brief overview:
The revision table documents all the modifications made to a drawing after its initial release. By recording changes, engineers, manufacturers, and other stakeholders can quickly identify what was altered, when it was changed, and who approved the change. This helps in maintaining the integrity of the design, ensuring accountability, and providing clarity, especially when multiple parties are involved.

Components: While the exact layout and information can vary based on company standards or specific industry requirements, a typical revision table includes:
Revision Number (or Letter): Sequential identifiers (like A, B, C or 1, 2, 3) assigned to each change. The initial drawing might start with "A" or "0", and each subsequent revision increments this identifier.
Description of Change: A brief note on what was modified in the drawing.
Date: The date when the revision was made.
Approved By: The signature or initials of the person who approved the change. In some cases, this may also include the name or initials of the person who made the change.
Zone/Location: Some tables reference a specific location or zone on the drawing where the change was made, especially on large or intricate drawings.
Placement: The revision table is usually placed above the title block area of the drawing, often in proximity to other vital information like the drawing title, number, scale, and date of issue.
Importance in Lifecycle Management: In product lifecycle management, the revision table provides a clear history of the drawing's evolution. This is particularly valuable when revisiting older designs, resolving discrepancies, or during quality audits.
In essence, the revision table is a historical record on a technical drawing. It ensures that even as changes are made, there's clarity and traceability back to the original design and all intermediate stages. This table is a testament to the iterative nature of design and engineering, emphasizing the importance of documentation in the process.
A revision tag can be added to the drawing to indicate where the change is made.

The coordinates of the revision tag can be added in the revision table, to make it easier for users to know where to look for the change.
The two main types of drawings
There are two critical types of technical drawings: the detail drawing and the assembly drawing. A detail drawing is a complete and accurate depiction of a single part or component, showing its dimensions, tolerances, and surface finish. It also includes any necessary information about the material used to make the part, such as its density, strength, and heat treatment requirements.
Part Drawing
On the other hand, an assembly drawing shows how multiple parts fit together to create a complete system. It includes information about the order in which the parts are assembled and how they are connected, such as with bolts or screws. An assembly drawing may also include a Bill of Materials (BOM), which is a comprehensive list of all the parts needed to create the assembly.
Assembly drawing
The BOM is a vital component of engineering documentation, as it ensures that all necessary parts are available when it comes time to assemble the system. A BOM typically includes a list of part names, descriptions, quantities required, and any special instructions for assembly. The BOM also helps to manage inventory and ordering, as it allows for accurate tracking of the materials used in production.

The Bill of Material (BOM)
Isometric projection
Isometric projection is a popular method used in technical drawing and engineering to represent three-dimensional objects in two dimensions. It is a type of projection that allows objects to be drawn at a 45-degree angle, providing a clear and accurate view of an object's shape, size, and dimensions.
Isometric projection was first introduced in the early 20th century and quickly gained popularity due to its simplicity and ease of use. It became standard practice in technical drawing and is still widely used today.
To create an isometric projection, a drafter starts by drawing a horizontal line and then drawing two lines at a 30-degree angle to the left and right of the horizontal line. These lines represent the X and Y axes of the object's three-dimensional space.
The drafter then draws a vertical line at a 90-degree angle from the horizontal line, representing the Z-axis. The intersection of the three lines forms the isometric axes, which the drafter uses to draw the object.
The object is drawn using a series of parallel lines that follow the isometric axes. These lines are spaced at equal distances to accurately represent the object's dimensions. The resulting drawing is a three-dimensional object represented in two dimensions.

Isometric projection is a valuable tool in technical drawing because it provides an accurate representation of an object's shape and size, allowing engineers and designers to create accurate and detailed plans. The isometric projection is also easy to read, making it an ideal choice for technical documentation and assembly instructions.
Although the Isometric view is best for giving a quick visualization of the part, it lacks the ability to show important details. If you try to add dimensions to the iso view, it quickly becomes crowded with information. Also, the angles and circular elements are distorted.
So, although it is helpful and recommended for every drawing to have an isometric view, it is generally only used for visualization and is not sufficient to fully describe the part and needs to be complemented with orthographic views.
Orthographic projection
Orthographic projection is the most fundamental technique used in engineering and design to represent 3D objects on a 2D surface.

Orthographic projection is a projection method where the front face of the object is always parallel to the picture frame, and the projectors are perpendicular to the picture frame. This means that one only sees the true front face, which is a 2D view of the object, while the receding faces are not seen. However, the other faces can also be viewed if the object is rotated through 90 degrees.
There are two laws that define how the six orthographic views are related to each other: first angle projection and third angle projection. In both cases, the views are the same, but the position of the views with respect to each other differs.
In third angle projection, the views are arranged such that the view one sees from their viewing position is placed on the same side as they view it from. For example, the plan view is seen from above, so it is placed above the front face because it is viewed from that direction. The right-side view is placed on the right-hand side of the front view, while the left-side view is placed to the left of the front view. The rear view is placed on the left of the left-side view, but it could have also been placed to the right of the right-side view.
First angle projection is commonly used in Europe, Asia, and other parts of the world. In this projection method, the object being represented is placed in the first quadrant of a coordinate system, with the viewing plane located between the object and the observer.
A symbol is usually placed in the title block to indicate which projection method is used. The symbol is a cone, where in first angle projection,
Although 6 main views can be generated using orthographic projection, usually 2 main views (or in some cases 3) are sufficient to fully describe the part. If a view is not necessary, it should not be included in the drawing.
The view that contains the most features of the part is usually called “the front view”. the view plotted to its right or left is the side view. Above or under it, is the top and bottom view.
You can generate a third view if you have 2 views drawn in the same scale, just to illustrate how these views are related, let’s look at how we can generate a third view in a drawing using a deflector line. Let's assume you have the front view and the top view, and you want to generate the left-side view.
Here's how you can do it using a deflector line:

Draw the front and top views, making sure they are aligned correctly and are in the same scale.
Draw a line perpendicular to the front view's reference line and extending towards the top view.
Draw a deflector line at a 45-degree angle to the front view's reference line, starting from the point where the first line intersects with the top view.
Draw a line parallel to the top view's reference line, starting from the end of the deflector line.
Where this line intersects with the line drawn in step 2, draw a line perpendicular to the top view's reference line, towards the right.
Draw a line parallel to the top view's reference line, starting from the end of the line drawn in step 5. This line will be the left-side view's reference line.
Measure the distance between the left-side view's reference line and the front view's reference line in the top view. Transfer this distance to the left-side view's reference line in the correct position.
Sketch the left-side view, using the dimensions and features from the front and top views.
By using a deflector line, you can ensure that the left-side view is aligned accurately with the front and top views. This technique can be used to generate any missing view in a drawing, as long as you have two adjacent views.
Section views
A section view is created by cutting the feature (of course in an imaginary sense, using an imaginary saw) in two halves and looking at the area that has been cut.
Section views are used when an object or component has internal features that need to be illustrated.
Section views are typically identified by thickened lines with arrows (this is where the imaginary saw cut the part) indicating the direction of the view, meaning, which half of the part will we be looking at. The line is also labeled with a section identifier, such as "Section A-A," "Section B-B," etc. The section identifier is used to match the section view with the corresponding plan view.
Hatching lines are used to indicate the cut surfaces of the object or component that is being sectioned. These lines are usually drawn at a 45-degree angle, although other angles can be used if necessary. Hatching lines are used to differentiate the cut surfaces from the surrounding areas and to provide a clearer view of the object or component's internal features. This means, that only areas that contain material and our imaginary saw had to cut through it will be hatched, holes and hollow shapes will not be hatched.
In assembly drawings, when different parts are cut in the same section, the hatching must be different for each part to improve visibility, changing the angle to 30, 60, or – 45 degrees is often the preferred choice for many designers.
Section lines do not have to be straight lines, they can also be stepped in which they include an offset. This can be helpful if the important internal features that we want to show, are not lying in the same plane.
Call out views in Technical Drawings
This video teaches viewers about using scale and call out views in technical drawings. It explains how to choose appropriate scales for different sizes of objects and how to identify the scale on a drawing sheet, particularly in the title block. The video highlights the importance of call out views for detailing specific features without altering the overall scale, as well as the guidelines for using them effectively in conjunction with section views.
Key Points:
Understanding Scale in Drawings
The video illustrates how to scale objects correctly in technical drawings, giving the example of a smartphone-sized connecting road and a 10m shipping container. The scale of a drawing helps visualize the dimensions accurately and is crucial for drawing representation.
Identifying Scale on a Drawing Sheet
To determine the scale being used on a technical drawing, one should refer to the title block. This section provides the general scale of the drawing, and it's important for users to know how to locate this information.
Using Call Out Views for Details
Call out views are specialized tools in technical drawings used to emphasize specific areas or features that require more attention. These views are indicated by a circle and arrow and are labeled appropriately, allowing for better clarity without changing the drawing's overall scale.
Guidelines for Call Out Views and Hatching
The video notes that call out views should be used judiciously to avoid cluttering the drawing. When employed, the hatching in callouts must match that of the section views for consistency, and purposefully highlights how these tools can enhance understanding of complex designs.
Next Steps in Learning
The video ends with a teaser for the subsequent lecture on breakout views and hidden lines, indicating the continuous learning approach of the course.
Hidden lines In Technical Drawing
This video introduces the concept of hidden lines in technical drawing, explaining their importance in representing edges and features that are not visible from a particular viewpoint. It highlights how hidden lines, drawn with dashed lines, help readers understand the unseen aspects of a technical drawing, particularly when analyzing complex machinery like a connecting rod.
Key Points:
Introduction to Hidden Lines
The video begins by introducing hidden lines in technical drawings, stating that they represent edges and features not visible from the current viewpoint. These lines act as indicators for the unseen aspects of an object.
Visual Representation
Hidden lines are drawn as dashed or dotted lines, distinct from solid lines that depict visible features. This visual distinction helps the reader to identify hidden elements effectively.
Example of Use
An example is provided using a connecting rod, where a hidden edge that cannot be seen from one side is represented by a dashed line, enhancing the reader's understanding of the object's full structure.
Summary of Learning
The overall lesson emphasizes that hidden lines are essential for understanding the full dimension of objects in technical drawings, similar to x-ray vision.
Transition to Advanced Topics
The video concludes by summarizing the skills learned in the previous sections of the course, such as projection, section views, and auxiliary views, and prepares learners for more advanced topics in technical drawing.
Dimensioning In Technical Drawing
This video explains the importance of dimensioning in technical drawings, which is essential for describing the sizes and positions of features on a part for manufacturing, quality control, and cost calculations. It covers various types of dimensions used in technical drawings including linear, diameter, radius, angular dimensions, and special features addressing standard practices for each type.
Key Points:
Purpose of Technical Drawings
Technical drawings are crucial for providing descriptions that facilitate manufacturing, quality control, and cost estimations of parts. Proper dimensioning allows for accurate representation of the sizes and positions of different features on the part.
Types of Dimensions
The video outlines several key types of dimensions: linear dimensions, which represent distances between edges; diameter dimensions, indicating circular features; radius dimensions for incomplete circles; and angular dimensions for angles between lines.
Linear Dimensions
Linear dimensions indicate the distance between two points or lines, helping to specify the size of the part or the location of features like holes.
Diameter and Radius Dimensions
Diameter dimensions (denoted with a diameter sign) are used for complete circular features, while radius dimensions (marked with an 'R') are typically applied to features that are not full circles, such as fillets.
Angular Dimensions
Angular dimensions help in defining the angle between two lines of the part, providing essential geometric information.
Special Features and Standards
Special dimensions for characteristics like threads and chamfers are also addressed, with a promise of more detailed discussions on these types in subsequent parts of the course.
Rules of Dimensioning
This video discusses important rules for dimensioning in engineering drawings, emphasizing clear communication for manufacturers and the avoidance of double dimensioning to prevent conflicts in information. It covers the significance of providing all necessary dimensions, the use of CAD models, and how to properly indicate reference dimensions.
Key Points:
Complete Description of Parts
In dimensioning, it is crucial to describe a part fully so that manufacturers can produce it without guesswork. This has traditionally involved detailing every feature, but modern practices often allow omission of some dimensions if a CAD model is provided, assuming the manufacturer can effectively read it.
Avoiding Double Dimensioning
Double dimensioning should be avoided as it can lead to inconsistencies in the drawing. Each feature should have its dimension indicated only once to prevent confusion and potential errors during manufacturing. Any changes to dimensions must be accurately updated.
Reference Dimensions
Reference dimensions can be used to provide additional information without duplicating existing dimensions. They are indicated with brackets to show they are for informational purposes only and not to be measured, thereby clarifying their significance without introducing potential errors.
Parallel, chain and running dimensioning
This video discusses three primary methods of dimensioning features in technical drawings: parallel dimensioning, chain dimensioning, and running dimensioning. It explains how each method applies to the positioning of features, the relation between those features, and the recommended uses for each dimensioning technique.
Key Points:
Parallel Dimensioning
Parallel dimensioning involves placing dimension lines from a reference or datum feature, such as the edge of a part, with dimensions running parallel to each other. This method is preferred when several features have the same functional relation to a reference, as it allows each feature to have independent tolerances. Changes can be made to one dimension without affecting others, making it a widely used method.
Chain Dimensioning
Chain dimensioning is utilized when features are interrelated and the distances between them are critical, such as when connected shafts require specific spacing. This method establishes a series of measurements; however, it is often avoided due to the risk of tolerance stacking, where the position of each feature impacts the next, potentially leading to cumulative errors.
Running Dimensioning
Running dimensioning is a continuous sequence of dimensions placed along the outline of a part, which efficiently indicates the locations of features at irregular intervals. It helps to reduce clutter on the drawing by streamlining the layout of dimension lines, and it functions similarly to parallel dimensioning with a different visual representation.
Dimensioning Standards
The video briefly mentions various national and international standards for dimensioning, such as ISO 129, which provide guidelines for placement, style, and the application of tolerances in technical drawings. Understanding these standards is recommended for anyone wanting to deepen their knowledge of dimensioning.
Tolerances in Technical Drawings
This video explains the concept of tolerances in technical drawings, emphasizing their necessity in the manufacturing process to account for deviations in produced parts. It discusses how tolerances play a crucial role in ensuring that parts fit and function correctly within an assembly, balancing the need for precision with cost considerations.
Key Points:
Definition of Tolerances
Tolerances refer to allowable deviations in dimensions specified in technical drawings. They are crucial because manufacturing processes inherently produce variations, meaning that a part will rarely match the exact dimensions given, such as a diameter of 30 mm.
Importance of Tolerances
Tolerances are essential for ensuring that manufactured parts can function together correctly. They control the acceptable limits of variation in dimensions, which is vital for assembly and the overall functionality of the product.
Manufacturing Process Challenges
There are unavoidable deviations in manufacturing due to various factors like machine vibration and tool wear. This unpredictability reinforces the need for tolerances to ensure that dimensions remain within a specified range.
Balancing Cost and Precision
While tighter tolerances mean higher precision and potentially higher manufacturing costs, it is vital to strike a balance. Designers must specify tolerances that are precise enough to ensure functionality but broad enough to be cost-effective.
Next Steps in Learning Tolerances
The video concludes with a promise to cover how to apply tolerances onto technical drawings in the next lecture, building on the understanding gained about their necessity and application.
What is Dimensional Tolerancing In Technical Drawings
This video covers the fundamentals of dimensional tolerancing in technical drawings, outlining the two primary types of tolerances, methods of indication, and the importance of tolerancing all dimensions. It discusses deviation tolerance methods, limit tolerance indication, and the use of general tolerances following standards like ISO 2768 and ISO 22081.
Key Points:
Types of Tolerances
There are two main types of tolerances discussed: dimensional tolerances, which allow a specific variation between maximum and minimum size limits, and geometrical tolerances, which deal with variations from true geometric form or position.
Indicating Dimensional Tolerances
The video explains methods for indicating dimensional tolerances on technical drawings. The deviation tolerance method shows allowable deviations written next to the nominal size, with examples of both equal bilateral and unilateral tolerances provided.
Limit Tolerance Indication
Another method discussed is limit tolerance indication, where the two size limits are directly written on the drawing. This method allows the designer to specify acceptable variation ranges for each dimension clearly.
General Tolerances
It is emphasized that all dimensions in a drawing must have tolerances, which can be indicated using general tolerances. These are notes added to a drawing to apply a standard tolerance to dimensions without explicit tolerances.
ISO Tolerance Standards
The video concludes with a discussion on general tolerance standards like ISO 2768 and the update to ISO 22081 since 2021, which uses geometric dimensioning and tolerancing (GD&T) for controlling general tolerances. Further discussions on limits and fits are promised in the next lecture.
.png)